Keycloak is an identity and access management tool supported by RedHat and widely used by larger organizations around the world. One of the main benefits of using keycloak is it offers a wide range of build in features like Single-Sign-On (SSO), Social Login, User Federation, identity brokering, etc.
Before moving forward some of you might have question like what is multi tenany and what are its advantages. In simple terms multi tenancy is a way in which single resource which can be software / server / DB etc can be shared by multiple organizations / users. The basic idea is each organiation / users data is isolated and cannot be accessed by others.
Traditionally multi-tenancy in keycloak is supported by considering each tenant as a separate realm but it has lots of disadvantages both in terms of performance as well as mentability / scalability of application. So today we are going to see how we can support multi-tenancy in keycloak via single-realm approach. In this approach, we consider each tenant as an separate group in parent realm which has its tenant-level properties stored in group attributes. Once the user is created it can be assigned to single or multiple groups and in this way, we can aggregate users based on which tenant they belong to.
Keycloak is an identity and access management tool supported by RedHat and widely used by larger organizations around the world. One of the main benefits of using keycloak is it offers a wide range of build in features like Single-Sign-On (SSO), Social Login, User Federation, identity brokering, etc.
Before moving forward some of you might have question like what is multi tenancy and what are its advantages. In simple terms multi tenancy is a way in which single resource which can be software / server / DB etc can be shared by multiple organizations / users. The basic idea is each organiation / users data is isolated and cannot be accessed by others.
Traditionally multi-tenancy in keycloak is supported by considering each tenant as a separate realm but it has lots of disadvantages both in terms of performance as well as mentability / scalability of application. So today we are going to see how we can support multi-tenancy in keycloak via single-realm approach.
In this approach, we consider each tenant as a separate group in parent realm which has its tenant-level properties stored in group attributes. Once the user is created it can be assigned to single or multiple groups and in this way, we can aggregate users based on which tenant they belong to.
Below are the steps on how this can be achieved via the admin console.
Step 1:
Create a realm under which all tenants will have their separate group. We have created a realm name Multi-tenant for our demo purpose.
Step 2:
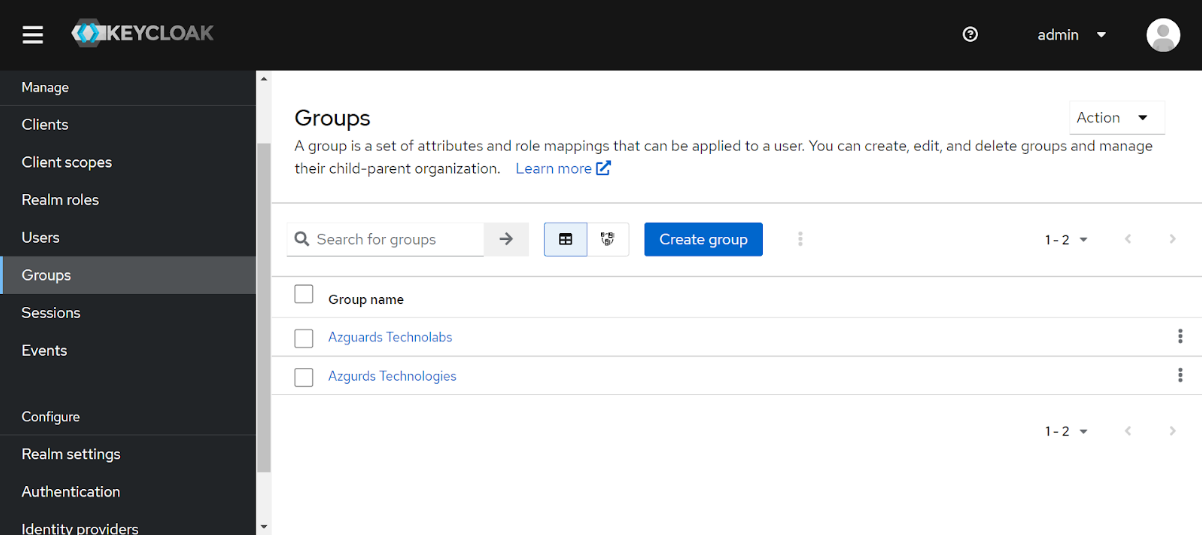
Create two groups let’s say Azgurds Technologies and Azguards Technolabs and consider them as separate tenants on the platform
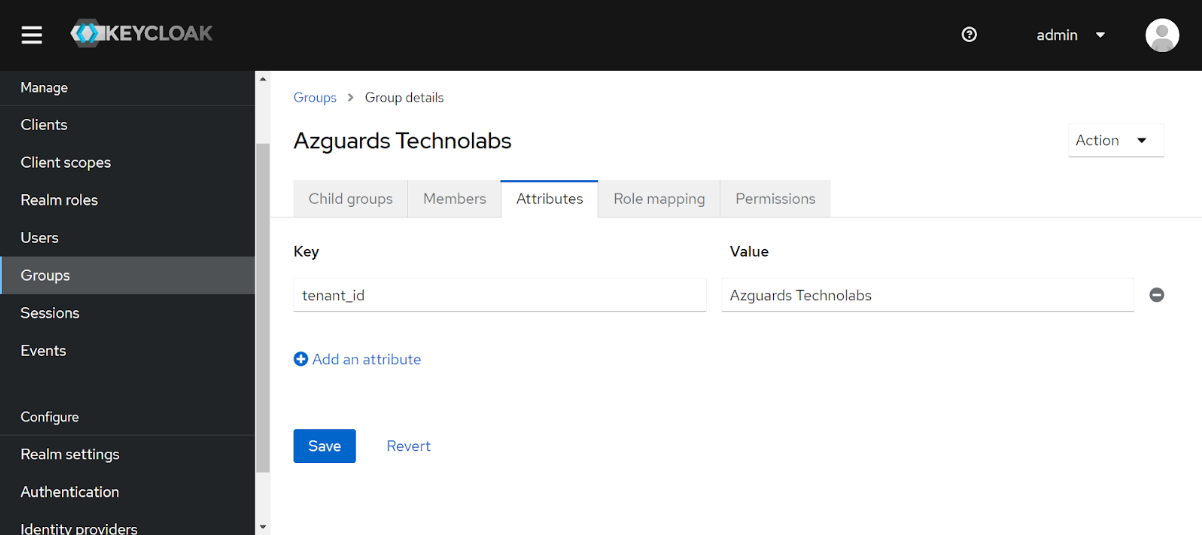
To identify which tenant the user belongs to we need to add a group attribute in JWT generated for the user. For this, we will have to assign a unique tenant_id as an attribute to each group.
Step 4:
Create two users and assign one to each individual group
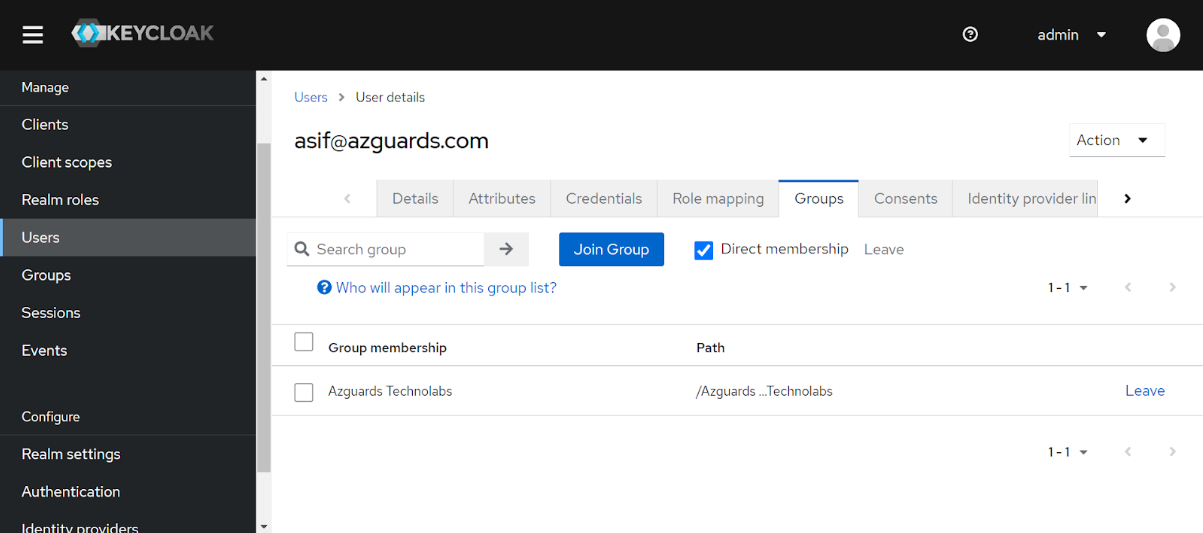
I have created two users named Asif and Ali and have assigned them to groups Azguards Technolabs and Azguards Technologies respectively. As you can see, I have created a user with the email [email protected] and it is part of the Azguards Technolabs group created in step 3.
Step 5:
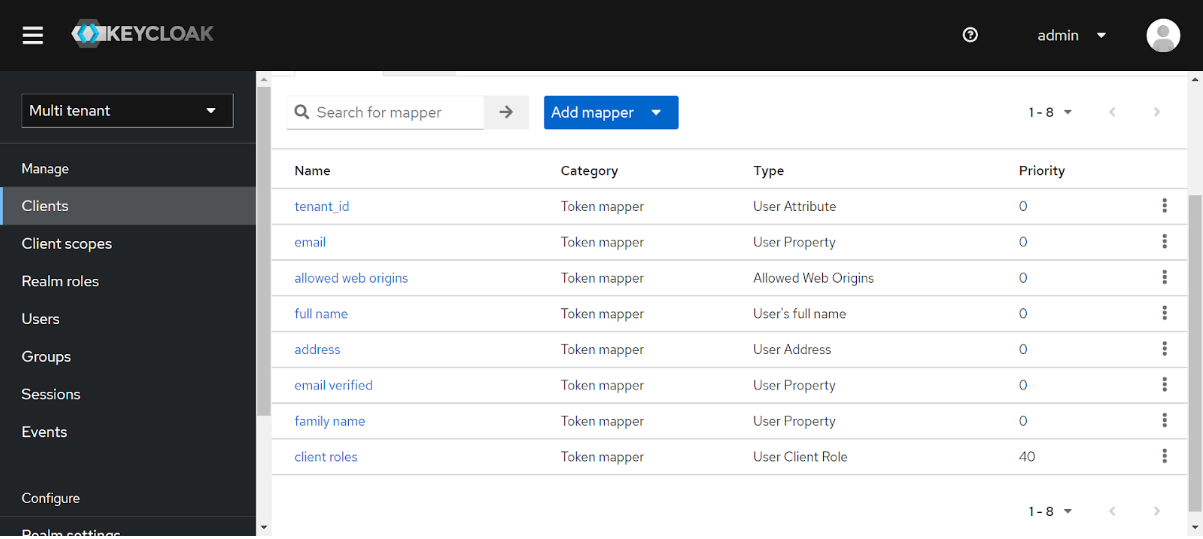
Modify JWT generation for a user to include tenant_id it will help us to identify the user belonging to which tenant and that can be used in the core application. To do this we need to configure a mapper for the client which is used for generating Access / Refresh tokens.
Step 6:
Now we will generate an Access token for both the user and will see how two different tenant_id are found on JWT generated for each user. Following is curl command to generate the access token
Click here to view and edit & add your code between the textarea tags
RESPONSE:
Click here to view and edit & add your code between the textarea tags
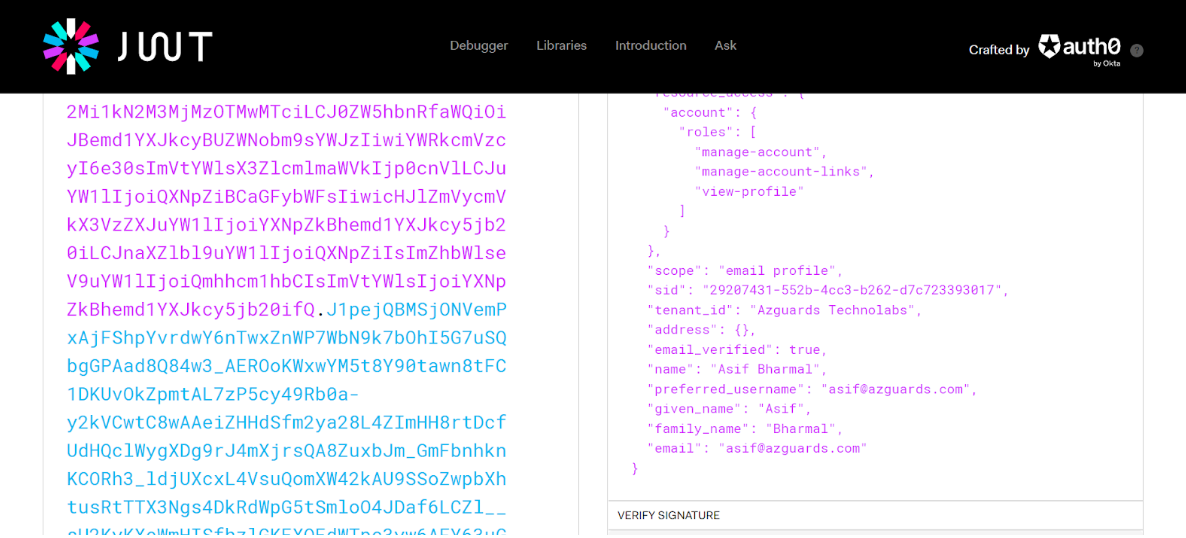
When we decode access token jwt we will find tenant_id for this particular user
We can also assign the same user to a different tenant with separate set of roles and responsibility for each tenant. We will try to cover this topic in later blogs.
Please feel free to contact me at asif@azguards.com for any questions/queries. You can also hire us for enterprise-level software development.